Table of Contents
When I purchased my first dedicated triathlon bike, a nearly 15 year old Cervélo P2 equipped with a set of Zipp race wheels, I wasn’t thinking about ceramic bearings, aerodynamic socks, drivetrain friction, or hydration placement. I was simply excited to own a bike designed for triathlon and eager to see where the sport could take me.
Like most athletes entering endurance sports, I quickly learned that the biggest limiter wasn’t my equipment.
It was my fitness.
The path to becoming a faster triathlete was straightforward. Swim more. Ride more. Run more. Strength train consistently. Recover well. Build the engine.
For several years, that remained true.
As my experience grew, however, so did my curiosity. I began asking questions that many endurance athletes eventually ask. Was my equipment limiting my performance? Was I leaving free speed on the table? Were some of the products marketed to triathletes actually backed by science, or were they simply expensive ways to make us feel faster?
Rather than accepting marketing claims at face value, I started reading aerodynamic studies, digging into wind tunnel testing, comparing rolling resistance data, and learning from engineers and fitters who dedicate their careers to understanding what actually makes a bicycle move through the air more efficiently.
What I discovered surprised me. Many of the so called marginal gains are very real.
No single upgrade transforms an average cyclist into a professional. A ceramic bearing won’t suddenly add twenty watts to your Functional Threshold Power (FTP), and a disc wheel won’t compensate for inconsistent training. But when viewed collectively, dozens of seemingly small improvements begin to create something meaningful. Two watts from one upgrade. Five from another. Perhaps ten from improving your position on the bike. Individually they may seem insignificant. Together they can represent a substantial reduction in the power required to maintain the same speed.
That realization changed the way I approached every equipment decision. I stopped asking whether something looked fast and started asking whether it had been shown to be fast.
Over time, that philosophy shaped the bike I race today. My Quintana Roo VPRi isn’t built to impress anyone standing in transition. It is built with intention. From the HED front wheel and rear disc to ceramic bearings, between the Vison aerobars hydration, an EZ Gains rear hydration mount, and a professional bike fit designed around a position I can comfortably hold for hours, every component serves a purpose. Every decision was made after asking the same simple question: Does this meaningfully improve performance?
Some upgrades were obvious. Others produced surprisingly small gains for a much larger investment. Along the way I also realized something that no wind tunnel test or aerodynamic study could quantify.
Every thoughtful upgrade removed uncertainty.
I no longer found myself wondering whether a different wheelset would have saved another minute or whether my hydration setup was costing me unnecessary drag. Those decisions had already been made. They had been researched, tested, and validated through training.
The conversation shifted from equipment to preparation.
Instead of wondering what else I could buy, I found myself asking a much more important question.
How much stronger can I become?
That question ultimately became the inspiration for this article.
This isn’t an argument that every athlete needs an expensive superbike or the latest aerodynamic accessory. In fact, I believe the opposite. The greatest return on investment often comes from understanding where meaningful gains exist, prioritizing them wisely, and recognizing when your money is better spent on coaching, training, or a professional bike fit than another piece of carbon fiber.
Here, we will separate evidence from marketing. We will examine what independent research tells us about aerodynamic drag, rolling resistance, drivetrain efficiency, clothing, hydration placement, wheels, helmets, and bike fit. We’ll discuss where meaningful watt savings can be found, where expectations should be tempered, and why every estimate must be viewed through the lens of rider size, speed, position, and race conditions.
Most importantly, we will explore why the pursuit of marginal gains has very little to do with buying speed and everything to do with removing excuses.
Because once you’ve optimized the bike, the equipment fades into the background.
What’s left is the only variable that truly determines your performance.
The engine.
Why Aerodynamics Matter More Than You Think
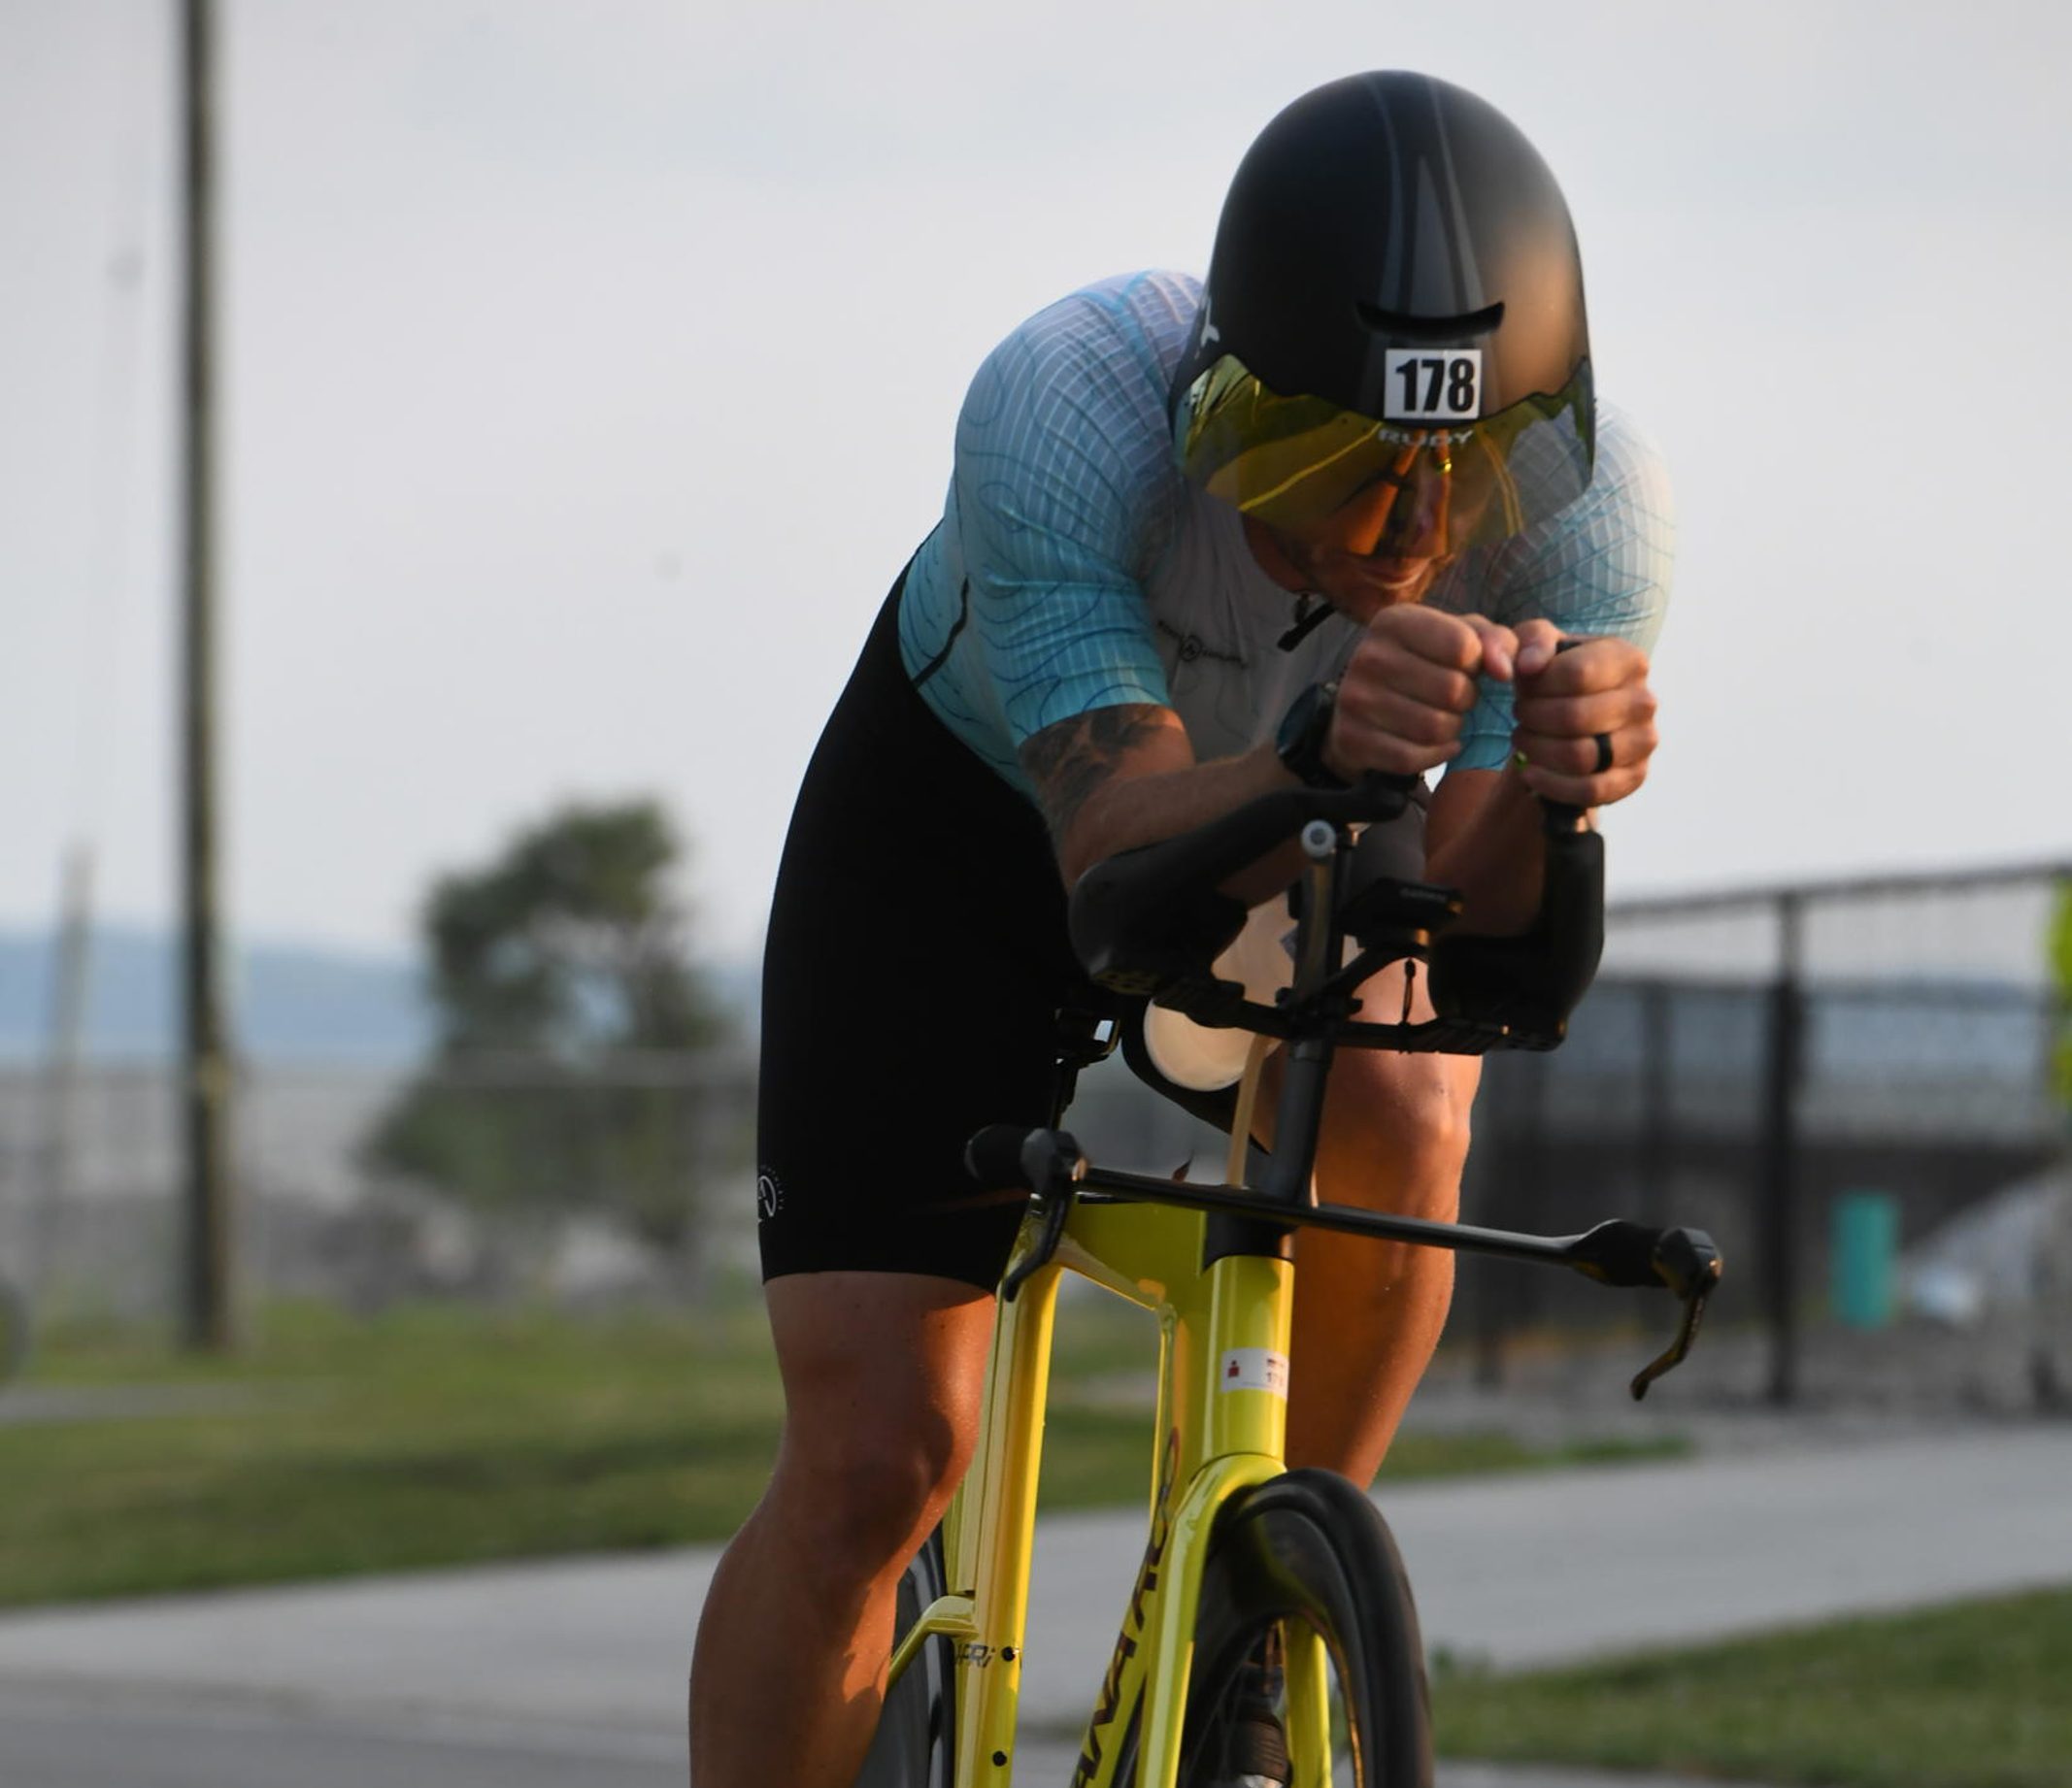
If you have ever ridden into a headwind, you already understand aerodynamics, even if you don’t realize it.
That invisible wall of air pushing back against you is the single greatest force you must overcome on most triathlon bike courses. While gravity, rolling resistance, and mechanical friction all require energy, aerodynamic drag quickly becomes the dominant factor as your speed increases.
At approximately 15 miles per hour, aerodynamic drag accounts for more than half of the resistance acting against a cyclist. By the time you’re riding between 20 and 25 miles per hour, roughly 80 to 90 percent of the power you’re producing is simply being used to move your body and bicycle through the air. In other words, very little of your effort is actually accelerating the bike. Most of it is spent overcoming drag.
That is why aerodynamics matter.
Unlike fitness, which may take months or even years to improve, aerodynamic efficiency can often be improved immediately. A better position on the bike, a properly fitted aero helmet, optimized hydration placement, or faster clothing can all reduce the amount of power required to maintain the exact same speed.
Think about it this way.
Imagine two athletes riding side by side at 22 miles per hour. Both have an FTP of 250 watts. One athlete requires 220 watts to maintain that speed because of an optimized aerodynamic position and equipment. The other requires 240 watts because of increased drag.
They are riding at the same speed. They are producing the same result. But one athlete is spending 20 fewer watts to get there.
Over the course of a 56-mile bike leg, those 20 watts represent a significant reduction in physiological stress. That energy is no longer being wasted fighting unnecessary drag. Instead, it becomes energy that can be used later in the race, particularly during the run, where many triathletes ultimately make or lose the most time.
This is why I encourage athletes to stop thinking about aerodynamics as “free speed.”
A better way to think about it is free efficiency.
Aerodynamics really does not magically make you stronger. It simply allows more of the fitness you have already built to translate into forward motion.
Another common misconception is that aerodynamics only matter for elite athletes riding 25 miles per hour or faster.
The opposite is actually true.
While faster athletes experience greater absolute watt savings because they move through the air more quickly, every athlete benefits from reducing drag. Whether you are averaging 17 miles per hour during your first 70.3 or chasing a podium at 25 miles per hour, your body is still pushing through the same air. Becoming more aerodynamic means requiring less power to maintain your pace, regardless of your speed.
It is also important to recognize that not every watt savings estimate applies equally to every rider.
Aerodynamic performance is influenced by countless variables, including rider size, body position, flexibility, wind speed, yaw angle, course profile, clothing, bike geometry, and even how consistently you remain in the aerobars throughout the ride.
Throughout this article, you will see estimated watt savings associated with different upgrades. Those numbers are compiled from independent wind tunnel testing, field testing, rolling resistance studies, and manufacturer data where appropriate. Think of them as realistic ranges rather than guarantees. One athlete may save four watts from an aerodynamic helmet while another saves twelve. A hydration system that performs exceptionally well on one bike may create more drag on another.
The goal is really not to chase an exact number.
The goal is to understand where meaningful opportunities exist and prioritize the upgrades that provide the greatest return for your investment.
Because once you understand that nearly every watt you save through aerodynamics is a watt your body no longer has to produce, every equipment decision becomes much easier to evaluate.
Before we start discussing specific upgrades, we’ll begin with the single most valuable aerodynamic investment available to every triathlete.
It isn’t a wheelset. It isn’t a helmet. It isn’t even a new bike.
It’s you.
The Biggest Marginal Gain Isn’t Your Bike. It’s Your Position.
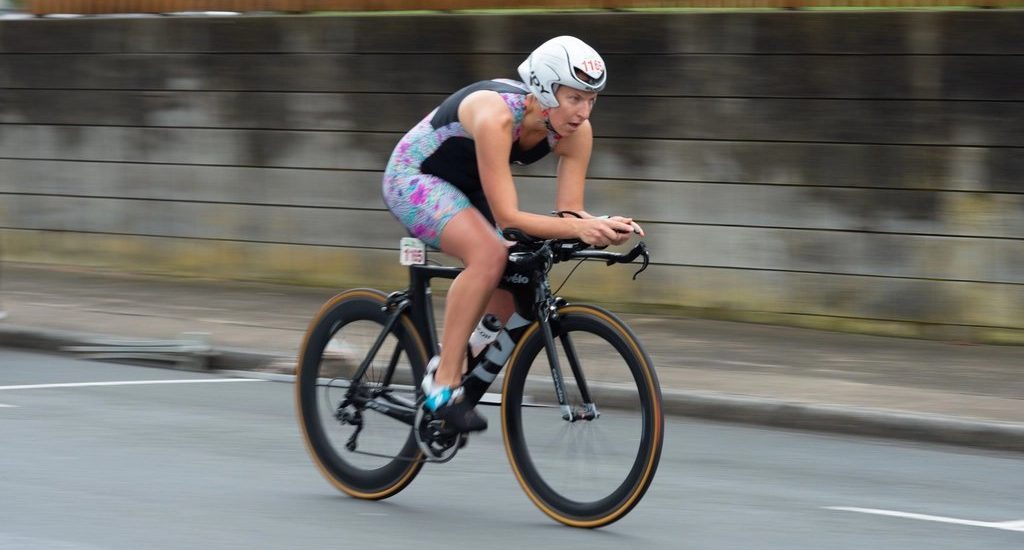
If someone handed me $5,000 and asked me to make them faster on the bike, I wouldn’t start shopping for carbon wheels, ceramic bearings, or the newest superbike.
I would 100% start with a professional bike fit. I think this answer would surprise a lot of athletes.
Deep wheels look fast. Disc wheels sound fast. Ceramic bearings, waxed chains, oversized pulley wheels, and integrated cockpits all have measurable performance benefits. We’ll discuss each of those throughout this article. But no upgrade consistently delivers the aerodynamic return of an optimized rider position that can actually be sustained.
Notice I didn’t say the most aggressive position.
I said the most sustainable position.
There is an important distinction.
The fastest position in a wind tunnel is not necessarily the fastest position over 56 or 112 miles. If your position forces you to sit up every few minutes because your neck hurts, your shoulders fatigue, your hips tighten, or your lower back begins to complain, you’ve erased much of the aerodynamic advantage you worked so hard to create.
The goal is not to look like a professional cyclist (admittedly that is cool)
The goal is to become the fastest version of you.
That starts with understanding where aerodynamic drag actually comes from.
Peer reviewed aerodynamic research, including work by Bert Blocken, Wouter Defraeye, and colleagues using wind tunnel testing and Computational Fluid Dynamics (CFD), has consistently demonstrated that the rider is responsible for approximately 70 to 80 percent of the total aerodynamic drag, while the bicycle itself contributes only 20 to 30 percent. That finding has been reinforced through additional industry testing by organizations including Swiss Side, FLO Cycling, and AeroCoach.
Think about that for a moment.
Many of us spend countless hours comparing frame designs, wheel depths, ceramic bearings, and the latest aerodynamic accessories, yet the single largest source of drag has been sitting on the saddle the entire time.
You.
Independent bike fitters and aerodynamic consultants routinely estimate that optimizing rider position can reduce aerodynamic drag enough to save 20 to 40 watts, with even larger gains possible for athletes transitioning from a traditional road position to a properly fitted triathlon position. For perspective, very few individual equipment upgrades can approach that level of performance improvement.
Perhaps even more fascinating is where many professional wind tunnel sessions ultimately end.
After evaluating different wheels, hydration systems, helmets, and clothing, much of the remaining optimization often comes down to one surprisingly simple variable: head position.
Published CFD research has shown that subtle changes in how a rider carries their head can produce larger aerodynamic differences than changing between several aero helmet designs. A rider who lifts their chin and exposes more frontal area may give away several watts, while simply lowering the head slightly and looking forward with the eyes can significantly improve airflow over the helmet, shoulders, and upper back.
This also explains why there is no universally “fastest” aero helmet.
The fastest helmet isn’t necessarily the one that tested best for another athlete.
The fastest helmet is the one that complements your posture, your shoulder width, your back profile, and your ability to maintain a consistent head position throughout an entire race.
When I invested in a professional bike fit, I wasn’t chasing the lowest possible front end or the narrowest arm position. My goal was to build a position that balanced four competing priorities: aerodynamics, comfort, power production, and sustainability.
That balance is personal.
For me, it also meant acknowledging the limitations that come with three shoulder surgeries following injuries I sustained during my years as a police officer. Those injuries aren’t something I can erase. Every ride reminds me of them. Rather than forcing my body into a position that looked fast in a wind tunnel but wasn’t sustainable, my fitter and I focused on creating the fastest position I could comfortably hold for hours. I often say, I am more comfortable in aero AND I put down more power IN aero!
As my mobility improved, my core became stronger, and I accumulated more time riding in the aerobars, that position continued to evolve. Small adjustments to saddle height, reach, stack, armrest width, extension angle, cockpit tilt, and even my head position produced measurable improvements without sacrificing comfort or power.
That experience reinforced one of the most valuable lessons I’ve learned as both an athlete and a coach.
Your position should evolve as your body evolves.
A bike fit should never be viewed as a one time appointment.
It should evolve alongside your flexibility, strength, experience, injury history, and ability to remain aerodynamic over the duration of your race.
One of the most overlooked aspects of aerodynamics is not achieving a fast position. It is absolutely your ability to consistently stay in it.
Every time you sit up to stretch your back, reach for a bottle, or simply because your position has become uncomfortable, your frontal area increases dramatically. In practical terms, you’ve deployed an air brake. Even brief periods out of the aerobars, repeated dozens of times throughout a race, can erase much of the benefit gained from expensive aerodynamic equipment.
That is one of the reasons I chose a between the aerobars hydration system on my own bike. It allows me to drink frequently without disrupting my position. Combined with in-frame nutrition storage and rear hydration, I can fuel with minimal movement while preserving one of the biggest aerodynamic advantages available to any triathlete: staying in the aerobars.
This is where many athletes unknowingly leave free speed on the table.
They invest thousands of dollars into equipment while overlooking the one upgrade that influences every second they spend on the bike.
A professional bike fit doesn’t simply improve comfort.
It improves efficiency. It improves power transfer. It reduces fatigue. It helps prevent overuse injuries.
Most importantly, it gives you a position you can confidently hold from the moment you leave T1 until you’re preparing to dismount in T2. If you are looking for the single highest return on investment in triathlon, start here.
Everything else we discuss in this article builds upon this foundation. Because the most aerodynamic bike in the world still has one major source of drag. The rider sitting on top of it.
The Aero Helmet: The Highest Return on Investment After Position

Once you have optimized your position on the bike, the next question becomes surprisingly simple:
How can you make that position even more efficient?
For most triathletes, one of the best answers is an aerodynamic helmet.
It is also one of the best examples of why independent testing matters.
Walk into any bike shop or browse online and you’ll quickly find manufacturers claiming their latest helmet is the fastest ever designed. While many of today’s aero helmets are exceptionally well engineered, years of wind tunnel testing have shown there is no universally fastest helmet.
There is only the fastest helmet for you.
That conclusion has been reinforced through testing by organizations such as Swiss Side, AeroCoach, FLO Cycling, Specialized’s Wind Tunnel, Trek, and other independent aerodynamic consultants. While individual rankings may differ, one finding remains remarkably consistent: helmet performance is highly dependent on the rider’s position, shoulder profile, and most importantly, head position.
In other words, your helmet does not work in isolation.
It works as part of an aerodynamic system consisting of your head, shoulders, upper back, and riding posture.
A helmet that saves twelve watts for one athlete may save only four watts for another, or in some cases perform worse than a different design altogether. The airflow leaving the helmet must transition smoothly onto the rider’s back. If that airflow separates too early because of poor head position or an incompatible helmet shape, much of the intended aerodynamic benefit is lost.
This reinforces one of the most important lessons from the previous section.
The rider remains the largest aerodynamic component on the bicycle.
Most modern aero helmets have demonstrated potential savings of approximately 5 to 15 watts when compared to a traditional vented road helmet. Depending on rider speed, posture, yaw angle, and helmet design, some athletes may see even greater improvements. While five watts may not sound significant, consider that those watts are working for you every second you’re moving down the road.
Unlike pacing, nutrition, or race tactics, your helmet never has an off day. It never gets tired. It never misses a workout.
Once you’ve selected the right helmet for your position, it quietly reduces drag for the entire race. Maybe, the most overlooked aspect of helmet performance isn’t the helmet itself.
It is your head position!
Computational Fluid Dynamics (CFD) studies and wind tunnel testing have demonstrated that relatively small changes in how a rider carries their head can influence aerodynamic drag as much as, and sometimes more than, switching between different aero helmet designs. Looking too far ahead by lifting your chin exposes more frontal area and increases drag. Looking too far down may compromise visibility and power production. The goal is to develop a neutral head position where you’re looking forward with your eyes while allowing the helmet to blend naturally into the contour of your shoulders and upper back.
This is why professional time trialists spend countless hours refining not only their equipment but also how they hold their head throughout an entire race effort.
The helmet complements the position. It does not replace it.
When selecting an aero helmet, comfort and ventilation should also be considered. The fastest helmet in the world provides little value if it’s uncomfortable enough that you constantly shift your head, adjust the fit, or avoid wearing it during longer races in hot conditions.
As with every other upgrade we discuss, the objective is not simply to buy the fastest product.
The objective is to identify the product that performs best within your complete aerodynamic system.
For me, transitioning to an aero helmet was not about chasing another flashy upgrade. It was another intentional decision supported by evidence. I wasn’t expecting it to magically transform my bike split. I simply wanted to remove another variable from race day.
Once I put it on, I no longer had to wonder if I was leaving free speed on the table.
That confidence is part of the return on investment.
As we continue to see throughout this guide, the best aerodynamic upgrades rarely deliver massive gains on their own. Instead, they build upon one another. A well fitted aero helmet enhances a well optimized riding position. Together, they create an aerodynamic system that is significantly faster than either could achieve independently.
Aero Helmet Summary
| Category | Typical Value |
| Estimated Watt Savings | 5 to 15 watts |
| Estimated 70.3 Time Savings | Approximately 30 seconds to 2+ minutes |
| Typical Cost | $200 to $400 USD |
| Return on Investment | ★★★★★ |
What the Research Says
- Independent testing consistently shows aero helmets outperform traditional vented road helmets for most triathlon positions.
- Helmet performance varies significantly between riders because airflow is heavily influenced by head position, shoulder profile, and back shape.
- A properly fitted helmet combined with a stable head position often produces greater aerodynamic gains than changing between several different helmet models.
- Rider position remains the dominant factor. The helmet enhances an optimized position but cannot compensate for a poor one.
My Coach Take
If you have already invested in a professional bike fit, an aero helmet is one of the smartest upgrades you can make. It provides meaningful aerodynamic savings, requires no additional fitness, and works every second you’re riding. Just remember: please do not chase the helmet your favorite professional wears. Chase the helmet that works best with your position.
The fastest helmet is not the one that won the wind tunnel shootout.
It is the one that is fastest and most comfortable on your head.
Clothing: The Fastest Upgrade You Already Wear

When most athletes think about becoming more aerodynamic, they immediately picture carbon wheels, aero helmets, or a new bike.
Rarely does clothing make the top of the list.
Ironically, it probably should.
After your position on the bike and an appropriately matched aero helmet, your clothing represents one of the highest return on investment upgrades available. Unlike your frame or wheelset, clothing directly interacts with the airflow moving around your body. Because your body generates the majority of aerodynamic drag, even subtle changes in how air flows over your shoulders, arms, torso, and legs can produce measurable performance gains.
Over the past decade, manufacturers have invested heavily in wind tunnel development, CFD, and textile engineering. The result is a generation of performance fabrics specifically designed to manipulate airflow, reduce turbulence, and delay airflow separation around the rider.
While that may sound overly technical, the concept is surprisingly simple.
Not all fabrics are equally aerodynamic.
Research conducted by organizations including Swiss Side, Specialized’s Wind Tunnel, Rule 28, AeroCoach, and testing published by several WorldTour equipment partners has consistently demonstrated that textured fabrics strategically placed on the shoulders, sleeves, and upper arms can reduce aerodynamic drag compared to traditional smooth Lycra. Rather than allowing airflow to separate early and create a turbulent wake behind the rider, these engineered materials help keep airflow attached to the body for longer, reducing drag.
This is why modern tri suits look very different than they did just a decade ago.
Long sleeves have replaced sleeveless designs. Different fabric textures appear across the shoulders, arms, and back. Every panel has a purpose.
For most athletes, a modern sleeved tri suit can provide approximately 8 to 15 watts of aerodynamic savings compared to a traditional sleeveless tri suit or loose fitting cycling apparel. Depending on rider speed, body position, and the specific garment, some athletes may experience even greater benefits.
That is an extraordinary return for an upgrade that you’ll wear every mile of every race. The same philosophy extends to one of the most debated accessories in endurance sports.
Lets talk about some Aero socks!
At first glance, they seem almost too simple to matter. How much difference can a pair of socks really make? Quite a bit, it turns out.
Independent testing conducted by SILCA, AeroCoach, Rule 28, and several professional cycling teams has shown that aerodynamic socks can reduce drag by approximately 2 to 8 watts, depending on sock height, fabric texture, rider position, and speed. The engineered ribbed materials help manage airflow around one of the most aerodynamically challenging parts of the rider’s body: the lower leg.
Considering that many aero socks cost less than a single race entry fee, they represent one of the best dollar per watt investments available in triathlon.
Calf sleeves follow a similar principle.
While originally popular for recovery and muscle support, several manufacturers have developed aerodynamically optimized calf sleeves designed specifically to reduce drag. Testing has demonstrated potential savings of approximately 2 to 6 watts, although results vary considerably depending on the athlete’s leg shape, riding position, and the interaction with socks and shoes.
In a change of pace, I decided to shave my legs for my last 70.3 to give it a go since it was not a wet suit legal race, and I would argue the smooth legs are ‘close’ in comparison to calf sleeves.
Maybe the most important lesson from all of this research is that these components rarely work independently.
A tri suit, aero socks, calf sleeves, helmet, and rider position function together as one aerodynamic system. Improving one component while ignoring the others often leaves performance on the table.
This is why professional cyclists and elite triathletes increasingly evaluate their complete aerodynamic package rather than individual products in isolation.
Personally, this is one of my favorite categories because it perfectly represents the philosophy of marginal gains.
None of these upgrades dramatically changes your performance overnight. A faster tri suit simply will not replace structured training. Aero socks will not compensate for poor pacing. Calf sleeves will not make up for missed workouts.
But together they quietly remove unnecessary drag, allowing more of the fitness that you have worked so hard to build to reach the pavement.
That is exactly what we are trying to accomplish. Not buying speed. Removing inefficiency.
Clothing Summary
| Category | Typical Value |
| Sleeved Tri Suit | 8 to 15 watts |
| Aero Socks | 2 to 8 watts |
| Aero Calf Sleeves | 2 to 6 watts |
| Estimated 70.3 Time Savings | Approximately 1 to 4+ minutes combined |
| Typical Investment | $40 to $350 USD |
| Return on Investment | ★★★★★ |
What the Research Says
- Modern sleeved tri suits consistently outperform sleeveless tri suits and loose fitting apparel in wind tunnel testing.
- Textured fabrics on the shoulders and sleeves help manage airflow and reduce drag.
- Aero socks repeatedly demonstrate measurable aerodynamic benefits despite their relatively low cost.
- Clothing should be viewed as part of the rider’s complete aerodynamic system rather than as an isolated upgrade.
My Coach Take
This is one of the easiest upgrades to underestimate because it doesn’t look exciting. There is not a new bike to show your friends or a flashy wheelset turning heads in transition. But if you’re serious about maximizing your performance, your clothing deserves the same attention as every other aerodynamic component.
The best part?
Once you zip up your tri suit and pull on your aero socks, they are working for you all day long without asking for another watt from your legs.
That is exactly the kind of marginal gain I am looking for in every race.
Hydration and Nutrition: Fueling Without Giving Away Free Speed

Every triathlete knows nutrition and hydration are essential to a successful race.
What many athletes don’t realize is that how you carry and access your nutrition can have just as much impact on your aerodynamic efficiency as what you’re consuming.
One of the biggest aerodynamic mistakes I see is not the wrong wheelset or helmet.
It is the athlete sitting upright every few minutes to reach for a bottle.
Each time you come out of the aerobars, your frontal area increases dramatically. Your chest catches more wind, airflow separates differently around your body, and aerodynamic drag immediately increases. Think of it as briefly deploying an air brake.
One or two times during a ride will not make a meaningful difference. Fifty or sixty times over the course of a 56 or 112 mile bike leg absolutely can.
This is why hydration should never be viewed simply as a nutrition strategy. It’s an aerodynamic strategy.
Over the past decade, organizations including Swiss Side, FLO Cycling, Profile Design, XLAB, and numerous wind tunnel studies have evaluated bottle placement in an effort to understand how hydration systems influence aerodynamic drag. While results vary depending on rider position, frame geometry, and bottle selection, one conclusion appears consistently throughout the research.
The fastest bottle is often the one that doesn’t force you out of your aero position. This is one of the reasons between the aerobars (BTA) hydration has become the standard among professional triathletes.
Contrary to what many athletes initially assume, a properly positioned BTA bottle often creates little additional drag and, in some rider positions, may actually improve airflow by helping smooth the transition between the rider’s forearms and torso. This has been confirmed with multiple wind tunnel studies with BTA systems.
The real advantage, however, isn’t measured only in watts. Think about this theme…it is measured in consistency.
A BTA hydration system allows you to drink every few minutes while remaining comfortably in the aerobars. Instead of sitting upright several dozen times throughout the race, fueling becomes almost effortless. Small actions like that accumulate over hours of riding.
Rear hydration follows a similar philosophy.
Years ago, rear mounted bottles were often criticized as being aerodynamically inefficient. More recent wind tunnel testing has shown that properly positioned rear hydration systems generally produce minimal aerodynamic penalties and, depending on the rider and bottle placement, can even reduce drag by helping manage airflow behind the rider’s body.
Like many aerodynamic topics, context matters.
Bottle placement, spacing, saddle height, rider position, and the number of bottles carried all influence the final result.
For my own setup, I use an EZ Gains rear hydration mount because it provides the flexibility to carry either one or two bottles depending on the race distance and my fueling strategy. Combined with my BTA hydration system, I can meet my hydration and nutrition needs while minimizing unnecessary movement throughout the ride. AND, that EZ Gains and BTA act essentially as a fairing deflecting and smoothing out the airflow around your body position.
Equally important is how I carry my nutrition.
I intentionally use integrated frame storage so gels and nutrition are immediately accessible without sitting upright, reaching into jersey pockets, or disrupting my position. Every movement on the bike has an aerodynamic cost. My goal has always been to minimize those costs wherever practical.
This section highlights something I’ve learned repeatedly while researching marginal gains. Sometimes the greatest benefit isn’t that a product saves five watts. It’s that it allows you to consistently remain in the position that saves thirty. Hydration systems should be evaluated the same way. Don’t simply ask where the bottle creates the least drag.
Ask which system allows you to comfortably fuel while remaining aerodynamic for the duration of your race. Those answers aren’t always the same. Like every other component we’ve discussed, your hydration system should support the rider, not distract from them.
When the gun goes off, I don’t want to think about where my next drink is coming from or whether I have to sit up to grab another bottle.
I want fueling to become automatic. One less decision. One less distraction. One more variable already solved before race day.
Hydration and Nutrition Summary
| Category | Typical Value |
| Between the Aerobars Hydration | 0 to 5 watt improvement depending on rider position |
| Rear Hydration | Neutral to approximately 3 watt improvement depending on placement |
| Integrated Frame Storage | Maintains aerodynamic position while fueling |
| Primary Benefit | Reduced time spent sitting upright |
| Return on Investment | ★★★★★ |
What the Research Says
- Between the aerobars hydration systems consistently perform well in wind tunnel testing and may even improve airflow for some riders.
- Rear hydration systems generally produce minimal aerodynamic penalties when properly positioned.
- Remaining in the aerobars while drinking often provides greater performance benefits than optimizing bottle placement alone.
- The rider’s consistency in maintaining position frequently outweighs small aerodynamic differences between hydration systems.
My Coach Take
This is one of those sections where the science and common sense intersect.
I don’t use between the aerobars hydration because someone told me it was faster.
I use it because it allows me to drink every few minutes without sacrificing the position I’ve spent countless hours refining.
The same philosophy applies to my rear hydration and integrated nutrition storage.
My fueling strategy isn’t designed just to meet my nutritional needs.
It’s designed to protect my aerodynamics.
The less I have to move, the less speed I give away.
Sometimes the fastest bottle isn’t the one with the lowest drag, it’s the one that keeps you in the aerobars.
Rear Disc Wheels and Disc Covers: Maximum Aerodynamics, Different Price Points
If there is one piece of equipment that consistently demonstrates meaningful aerodynamic gains, it is a rear disc wheel.
Decades of wind tunnel testing have shown that replacing a traditional spoked rear wheel with a disc significantly reduces aerodynamic drag. Depending on rider speed, wind conditions, and wheel design, athletes can expect approximately 8 to 20 watts of savings compared to a conventional spoked rear wheel. That makes the rear disc one of the highest performing equipment upgrades available in triathlon.
The reason is relatively straightforward.
By eliminating the turbulence created by spinning spokes, a disc wheel presents a much cleaner aerodynamic surface to the wind. The result is reduced drag, particularly as wind approaches the rider from varying yaw angles commonly experienced outdoors.
This is why you’ll routinely see rear discs used by professional triathletes, time trial specialists, and age group athletes chasing every available advantage.
Fortunately, achieving those aerodynamic gains doesn’t always require purchasing a dedicated full carbon disc wheel.
For athletes looking to maximize performance while minimizing cost, rear disc covers offer one of the best values in the sport.
Products such as the EZ Gains Disc Cover allow athletes to transform an existing rear wheel into a disc by attaching lightweight composite panels to each side of the wheel. While the construction differs from a structural carbon disc, the aerodynamic principle remains the same.
The air reacts to the shape. Not the price tag.
This concept is not unique to aftermarket disc covers. Manufacturers including HED and Vision have long utilized aerodynamic fairing concepts in some of their wheel designs, demonstrating that carefully shaping the airflow around the wheel is often more important than the construction method itself.
Independent testing from organizations including FLO Cycling, AeroCoach, and numerous experienced aerodynamic testers has repeatedly shown that properly installed disc covers perform remarkably close to many dedicated carbon rear discs. While differences certainly exist between individual wheel designs, those differences are often measured in only a handful of watts.
That is certainly remarkable considering the difference in cost. A premium carbon rear disc may cost between $2,000 and $3,500 (although some off-brands can be found for closer to $400-500). A quality disc cover often costs a fraction of that.
For many athletes, that makes a disc cover one of the highest dollar per watt investments available in endurance sports.
When I built my own race bike, I chose a HED rear disc because it aligned with the complete aerodynamic system I was creating. My position had already been optimized. My hydration strategy allowed me to remain in the aerobars. My clothing had been selected with aerodynamics in mind. The rear disc became another logical piece of that puzzle.
If I were building a race bike on a tighter budget today, I would not hesitate to recommend a quality disc cover, look at more budget-friendly brands, a used disc wheel, or one that you can get for a discount (HED offers military, first responder discounts!)
The physics do not change simply because the price does. The objective remains exactly the same. Reduce drag. Protect your watts.
Let your engine do less work to produce the same speed.
Rear Disc Summary
| Option | Estimated Watt Savings | Typical Cost | ROI |
| Full Carbon Rear Disc | 8 to 20 watts | $400 to $3,500+ | ★★★★☆ |
| Rear Disc Cover | Within approximately 1 to 3 watts of many dedicated disc wheels | $100 to $300 | ★★★★★ |
What the Research Says
- Rear disc wheels consistently rank among the fastest aerodynamic equipment upgrades available for triathlon.
- Independent testing has demonstrated that properly installed rear disc covers perform remarkably close to many dedicated carbon disc wheels.
- The aerodynamic benefit comes primarily from the external shape presented to the airflow rather than whether the wheel is a structural carbon disc or fitted with a cover.
- For many athletes, a disc cover delivers one of the best performance per dollar investments available.
My Coach Take
If you are chasing every possible watt and your budget allows it, a premium rear disc wheel is an outstanding investment.
If your budget doesn’t allow it, don’t assume you have to sacrifice meaningful performance.
A well installed rear disc cover gets you remarkably close for a fraction of the cost.
That’s the beauty of understanding the science. You’re no longer buying equipment based on price. You’re buying it based on performance
Tires, Tubes, Tire Pressure, and Rolling Resistance: Finding Free Speed Where the Rubber Meets the Road
If aerodynamics dominate your performance once you’re moving through the air, rolling resistance determines how efficiently your power reaches the pavement.
Every revolution of your wheels creates small losses as your tires deform against the road surface. Those losses may seem insignificant in isolation, but over the course of a 56 or 112 mile bike leg they become measurable, repeatable, and perhaps most importantly, highly preventable.
This is one of the few areas in cycling where independent testing has become exceptionally robust.
Organizations such as Bicycle Rolling Resistance, SILCA, Continental, and numerous World Tour equipment partners have spent years quantifying how different tires, tubes, tire pressures, and road surfaces influence rolling resistance. Unlike many aerodynamic claims, rolling resistance can be measured with remarkable consistency.
The findings are difficult to ignore.
Not all tires are created equal.
A premium race tire can require 5 to 10 fewer watts per tire than a slower training tire at the same pressure. Across both wheels, that can represent 10 to 20 watts before considering tubes or tire pressure.
Think about that for a moment. Simply replacing a pair of slower tires with a modern, low rolling resistance race tire may save as many watts as some athletes spend thousands of dollars chasing through other upgrades.
One of the most consistently high performing tires in independent testing has been the Continental Grand Prix 5000 series, available in clincher, tubeless, and time trial variants. While several excellent options exist from manufacturers such as Vittoria, Pirelli, Schwalbe, Michelin, and Goodyear, the broader lesson remains the same: buy fast tires.
They really are one of the best investments you will make. A common theme of this article. The conversation doesn’t stop with tires. The type of tube or tubeless system you choose also influences rolling resistance.
Traditional butyl inner tubes remain durable and inexpensive, but they generally produce the highest rolling resistance of the common options.
Latex tubes have long been considered one of the fastest choices, often reducing rolling resistance by 2 to 5 watts per wheel compared to butyl tubes. Their downside is increased air loss, requiring inflation before nearly every ride.
More recently, ThermoPlastic Urethane (TPU) tubes have become increasingly popular because they offer rolling resistance approaching latex while weighing significantly less and providing greater puncture resistance than many riders expected.
Tubeless systems represent another compelling option.
Beyond reducing rolling resistance by eliminating friction between the tube and tire, tubeless setups allow riders to safely use lower tire pressures. Lower pressures improve comfort, increase traction, and often reduce rolling resistance on real world road surfaces by allowing the tire to conform to imperfections rather than bouncing across them.
This is an important distinction. For years, cyclists believed that higher tire pressure automatically meant lower rolling resistance. The research tells a different story.
On perfectly smooth laboratory drums, that may be true.
On real roads filled with cracks, seams, and imperfect pavement, excessively high pressures often make riders slower because the bicycle begins bouncing rather than rolling smoothly over the surface.
This phenomenon, sometimes referred to as impedance losses, has fundamentally changed how many professional teams approach tire pressure.
Instead of maximizing pressure, today’s goal is to optimize pressure.
Tools such as the SILCA Tire Pressure Calculator consider rider weight, tire width, wheel type, road surface, and riding conditions to recommend pressures that maximize efficiency rather than simply increasing firmness.
Personally, this was one of the more eye opening areas of my own research. Like many cyclists, I used to assume firmer tires meant faster riding. The evidence simply didn’t support that assumption.
Today I choose tires, pressures, and wheel setups based on independent testing rather than old cycling myths. Another lesson became equally clear. Your tires are one of the very few components connecting your body to the road. Don’t compromise there.
Fast tires, appropriate pressure, and an optimized tube or tubeless system don’t just reduce rolling resistance. They improve confidence in corners. They improve comfort. They improve traction. And they quietly reduce the number of watts required to maintain race pace.
That’s an extraordinary return for one of the least expensive upgrades on the bicycle.
Rolling Resistance Summary
| Upgrade | Estimated Watt Savings | Typical Cost | ROI |
| Premium Race Tires | 10 to 20 watts (pair) | $150 to $250 | ★★★★★ |
| Latex Tubes | 4 to 10 watts (pair) | $30 to $50 | ★★★★★ |
| TPU Tubes | 3 to 8 watts (pair) | $40 to $70 | ★★★★★ |
| Tubeless Conversion | 2 to 8 watts plus improved ride quality | $75 to $200 | ★★★★☆ |
| Optimized Tire Pressure | 2 to 10 watts | Free | ★★★★★ |
What the Research Says
- Premium race tires consistently outperform slower training tires by substantial margins.
- Rolling resistance differences between tires frequently exceed the gains from much more expensive equipment upgrades.
- Lower pressures are often faster on real world roads than excessively high pressures.
- Tire selection, tube choice, and inflation pressure should always be considered as a complete system rather than individual decisions.
My Coach Take
This is one of the easiest recommendations I make.
Before spending thousands of dollars upgrading your bike, spend a couple hundred dollars upgrading what actually touches the road.
Fast tires, the right pressure, and an efficient tube or tubeless setup will reward you every single ride.
Some of the biggest, easiest gains are actually where the rubber meets the road.
Drivetrain Efficiency: Protecting Every Watt You Produce

You can spend months increasing your Functional Threshold Power (FTP) and you can execute every interval perfectly and you can arrive on race day in the best shape of your life.
But if your drivetrain is dirty, inefficient, or poorly maintained, some of those hard earned watts never make it to the rear wheel.
Unlike aerodynamics, which reduce the power required to maintain a given speed, drivetrain efficiency determines how much of the power you generate actually reaches the pavement.
Fortunately, drivetrain losses are measurable.
Laboratory testing conducted by organizations including CeramicSpeed, Friction Facts, Zero Friction Cycling, SILCA, and numerous independent drivetrain researchers has consistently demonstrated that proper chain lubrication, drivetrain cleanliness, and thoughtful component selection can save meaningful amounts of power.
Cleanliness and Lubrication: The Foundation of Efficiency
One of the largest and least expensive improvements available is also one of the simplest.
Keep your chain clean.
A contaminated drivetrain increases friction between every moving component. Dirt, grit, and worn lubricant create unnecessary resistance that slowly robs power with every pedal stroke.
Independent testing has shown that a clean, properly lubricated chain can save 3 to 5 watts compared to a neglected drivetrain.
That’s before considering modern wax based lubrication.
Chain waxing has become increasingly popular among professional cyclists and triathletes because it significantly reduces friction while also minimizing contamination from dirt and debris. Testing from Zero Friction Cycling, SILCA, and CeramicSpeed has repeatedly demonstrated that a properly maintained waxed chain can provide an additional 2 to 5 wattimprovement over many traditional wet, oil-based lubricants while dramatically extending drivetrain life.
That makes chain waxing a solid return on investment, but it does require some effort.
It is not glamorous, no one notices it in transition, but your power meter certainly will.
Ceramic Bearings: Small Gains, Big Expectations
Another upgrade that generates considerable discussion is ceramic bearings. There is no question they reduce friction. Independent testing has consistently shown measurable improvements compared to standard steel bearings.
The important question is how much.
For most athletes, a complete set of ceramic bearings typically saves less than 2 watts compared to high quality, properly maintained steel bearings.
That is real. But it is also important to keep that number in perspective. A dirty chain can easily cost more watts than ceramic bearings save. This perfectly illustrates the philosophy of marginal gains.
Prioritize the biggest returns first. Then work your way toward the smaller refinements. Oversized pulley wheel systems follow a similar pattern.
Testing generally suggests savings in the range of 1 to 3 watts, depending on chain tension, drivetrain configuration, and system design. Again, measurable improvements exist, but they should come after the fundamentals have been addressed.
1x vs. 2x: Simplicity, Aerodynamics, and Race Execution
One area that has generated increasing interest in triathlon over the past several years is the move from a traditional 2x drivetrain to a 1x setup (two chainrings in the front versus only one).
At first glance, the aerodynamic advantage appears modest. Removing the front derailleur, additional chainring, front shifter, and associated cables or wiring creates a cleaner leading edge around the drivetrain while also reducing weight and mechanical complexity. Depending on the bicycle, rider, and testing methodology, the aerodynamic benefit is generally estimated to be 1 to 3 watts.
While that alone won’t transform your bike split, the advantages of a one by drivetrain extend well beyond aerodynamics.
Mechanical simplicity is one of its greatest strengths.
With only a single chainring, there is no front derailleur to adjust, no front shift to manage, and significantly less chance of dropping a chain during a race. For many triathletes, that translates to fewer distractions and greater confidence, allowing them to stay focused on pacing, nutrition, and execution rather than managing gear combinations.
Chainline also deserves consideration.
A one by drivetrain isn’t automatically more efficient than a two by drivetrain. In fact, if you’re forced to spend significant time in the largest or smallest cogs on the cassette, drivetrain friction can increase because of more extreme chain angles. Selecting the appropriate chainring size and cassette combination is essential to maintaining an efficient chainline across the terrain you will be racing.
For flatter courses and many Ironman and IRONMAN 70.3 events (Ohio 70.3 sticks out in my mind), a thoughtfully selected 1x drivetrain can provide an excellent balance of aerodynamic efficiency, mechanical simplicity, and reliable gearing. Courses featuring prolonged climbs or constant elevation changes may still favor a 2x configuration depending on the athlete’s power, cadence preferences, and gearing requirements (Wisconsin 70.3 and full come to mind)
For my own racing, I ultimately chose a 1x drivetrain because it aligned with both the races I compete in and the philosophy behind this entire article. It provided a cleaner aerodynamic profile, simplified race execution, reduced mechanical complexity, and eliminated one more variable I didn’t want to think about on race day. My focus isn’t on shifting between chainrings. It’s on staying in the aerobars, maintaining power, fueling consistently, and executing my race plan.
Was it the single biggest marginal gain on my bike? Not even close.
But that’s the point. Marginal gains are rarely about one upgrade.
They’re about dozens of thoughtful, evidence based decisions working together to create a faster, more efficient system. That philosophy continues throughout every component on my bike. Every upgrade serves a purpose. Every upgrade was selected intentionally. Every upgrade contributes something.
None of them individually transform my performance.
Together, however, they create a system that protects every watt I’ve worked so hard to produce in training.
That’s the objective.
Not creating more power. Making sure none of it goes to waste.
Drivetrain Summary
| Upgrade | Estimated Watt Savings | Typical Cost | ROI |
| Clean Drivetrain | 3 to 5 watts | Minimal | ★★★★★ |
| Waxed Chain | 2 to 5 watts | $30 to $100 | ★★★★★ |
| Ceramic Bearings | Less than 2 watts | $300 to $800+ | ★★☆☆☆ |
| Oversized Pulley Wheels | 1 to 3 watts | $400 to $700 | ★★☆☆☆ |
| 1x Drivetrain | 1 to 3 watts | Varies by groupset | ★★★★☆ |
What the Research Says
- A clean drivetrain consistently provides some of the highest returns relative to cost.
- Wax based lubrication has repeatedly demonstrated lower drivetrain friction than many traditional lubricants.
- Ceramic bearings produce measurable but relatively modest efficiency improvements.
- Oversized pulley wheel systems offer incremental gains once the drivetrain has already been optimized.
- A one by drivetrain offers modest aerodynamic gains while simplifying race execution and reducing drivetrain complexity.
- The greatest drivetrain efficiencies come from treating the entire system rather than focusing on individual components.
My Coach Take
This chapter perfectly illustrates why I love the concept of marginal gains.
It’s easy to become distracted by expensive upgrades while overlooking the fundamentals.
I’d rather see an athlete riding a clean, waxed drivetrain with properly maintained components than someone chasing ceramic bearings while their chain is covered in dirt.
When I chose ceramic bearings and a one by drivetrain for my own bike, I wasn’t expecting miracles.
I was refining an already optimized system. Big rocks first. Small rocks second. Protect every watt you’ve earned. Because your drivetrain doesn’t create power.It simply determines how much of your hard earned power actually reaches the road.
Putting It All Together: Building an Efficient System
At this point, we’ve discussed rider position, helmets, clothing, hydration, wheels, tires, and drivetrain efficiency. Individually, none of these upgrades will transform an average cyclist into a professional.
Together, however, they tell a very different story and that is the essence of marginal gains.
The objective has never been to find one magical upgrade.
It is to identify dozens of small opportunities that, when combined, allow more of your hard earned fitness to translate into forward motion. This is also where it’s important to set realistic expectations.
The watt savings discussed throughout this article should never be added together as though every athlete will magically save 100 watts by purchasing new equipment.
It doesn’t work that way.
Many aerodynamic gains overlap.
Some upgrades complement one another, while others become less impactful because previous improvements have already reduced the available drag. Rider size, flexibility, speed, course profile, wind conditions, bike geometry, and even your ability to consistently remain in the aerobars all influence the final outcome.
Think of these numbers as potential opportunities rather than guarantees.
If you’re riding an older road bike with a loose fitting jersey, standard road helmet, training wheels, butyl tubes, and an unoptimized position, the cumulative gains available may be substantial.
If you are already riding a professionally fitted triathlon bike with carefully selected equipment, your remaining gains may only be measured in a handful of watts. That’s perfectly normal.
As you become more optimized, every additional improvement becomes harder to find.
That’s exactly what marginal gains are supposed to look like.
Where Should You Spend Your Money?
If I were starting over today, knowing everything I know now, this is the order I would prioritize my investments.
| Priority | Upgrade | Estimated Savings | ROI |
| 1 | Professional Bike Fit | 20 to 40 watts | ★★★★★ |
| 2 | Structured Coaching and Training | Very high ceiling | ★★★★★ |
| 3 | Aero Helmet | 5 to 15 watts | ★★★★★ |
| 4 | Premium Tires and Optimized Tire Pressure | 10 to 20 watts | ★★★★★ |
| 5 | Sleeved Tri Suit | 8 to 15 watts | ★★★★★ |
| 6 | Aero Socks | 2 to 8 watts | ★★★★★ |
| 7 | Hydration and Nutrition Optimization | Position dependent | ★★★★★ |
| 8 | Deep Front Wheel | 5 to 10 watts | ★★★★☆ |
| 9 | Rear Disc Wheel or Disc Cover | 8 to 20 watts | ★★★★★ |
| 10 | Waxed Chain | 2 to 5 watts | ★★★★★ |
| 11 | 1x Drivetrain | 1 to 3 watts | ★★★★☆ |
| 12 | Ceramic Bearings | Less than 2 watts | ★★☆☆☆ |
| 13 | Oversized Pulley Wheels | 1 to 3 watts | ★★☆☆☆ |
Some readers may be surprised that a professional bike fit sits above carbon wheels.
Others may wonder why coaching appears on an article about aerodynamics.
The answer is simple:
The bike can only amplify the engine that’s already there. A faster bike cannot replace structured training. A disc wheel cannot replace consistency. Ceramic bearings cannot replace intervals.
Those upgrades simply help preserve the fitness you’ve already earned.
Looking at my own bike today, every component represents a deliberate decision. My Quintana Roo VPRi provides the aerodynamic platform. My professional bike fit gives me a position I can comfortably maintain for hours. My HED front wheel and rear disc reduce aerodynamic drag. My 1x drivetrain simplifies race execution. My ceramic bearings and waxed chain minimize friction. My BTA hydration, EZ Gains rear hydration mount, and integrated nutrition storage allow me to fuel without repeatedly leaving the aerobars.
Every component has a job.None were selected because they looked fast.They were selected because the available evidence suggested they would contribute to a faster, more efficient system.
And that’s the key. A bike should never be viewed as a collection of expensive upgrades. It should be viewed as a complete system where every component complements the next.
Position enhances the helmet. The helmet enhances the rider. The clothing complements the position. The hydration strategy helps preserve the position. The wheels amplify the aerodynamics. The tires reduce rolling resistance. The drivetrain protects every watt you’ve produced.
Each decision builds upon the previous one. By itself, each improvement may seem relatively small. Collectively, they create something much greater than the sum of their individual parts.
That’s the true power of marginal gains.
Not because they make you unbeatable. Because they allow every ounce of fitness you’ve built to reach the road as efficiently as possible. And once you’ve reached that point…something interesting happens. The conversation changes. It stops being about equipment.
It starts being about the athlete.
The Engine: The Only Variable Left

When I first started researching aerodynamics, I thought I was chasing speed. Now that I take a minute to look back on it, I was really chasing certainty. I wanted to know that I wasn’t leaving free speed on the table I wanted confidence that my position was optimized. That my equipment was working for me instead of against me. I wanted to know that ever dollar I invested had a measurable purpose. That every watt I could reasonably save had already been accounted for.
Along the way, I think something unexpected happened. The more I optimized my bike, the less I thought about my bike. I stopped wondering whether different wheels would make me faster. I stopped questioning whether I should have chosen another helmet. I stopped thinking about tire pressure, hydration placement, drivetrain friction, or if I had overlooked another equipment piece.
All of those questions were answered. The bike was purpose built to do its job. Now, it was/is, my turn. That is the point I hope every athlete reaches. Not because you have purchased every upgrade available, not because you have built the most expensive bike in the transition area, but because you have thoughtfully optimized within your financial means, the variables that make sense for your goals.
Whether that means adding an aero helmet, installing a rear disc cover instead of buying a dedicated disc wheel, investing in a professional bike fit, or simply choosing a faster set of tires, every decision should have a purpose where you eventually reach a point where there are no meaningful equipment questions left to answer.
The bike fades into the background and what is left is the engine, you. Your aerobic fitness, your FTP, your durability, your discipline, your pacing, your nutrition, your recovery. Your willingness to keep showing up long after the excitement of buying new equipment has worn off. That is where your goals are crushed, and races are won. The intervals you completed when nobody was watching, the long rides that started before sunrise, the strength sessions you did not skip. The consistency you build over months and years. No aero helmet can replace that, no wheelset can manufacture that, no ceramic bearing can compensate for its absence. The bike simply allows your preparation to speak for itself.
When I look at my tri bike today, while I do see a very obnoxious yellow color, I don’t see carbon wheels, ceramic bearings, aero hydration, or a carefully selected drivetrain. I see a system. A purpose-built system designed to remove unnecessary drag. A system designed to minimize wasted energy, and a system that is designed to ensure that when I cross the finish line, my result reflects my preparation rather than preventable inefficiencies.
If you have made it this far into this long article, I am finally to the ‘why’, these reasons are the why I believe so strongly in marginal gains. Not because equipment wins races, but because equipment shouldn’t lose them. It is a subtle difference, but an important one. Optimize what you can, understand the science behind the optimizations (or trust those smarter than us), spend your money intentionally. Invest where the evidence tells you to invest (question the marketing in this sport), and stop worrying about your bike.
Go build your engine.
Once you have optimized everything within your means, the only thing left determining your performance isn’t your frame, wheels, helmet, or drivetrain. It is you. Honestly, that’s exactly where I am and where I want to be. I want to stand on the starting line knowing that I have done all possible to remove unnecessary resistance.
Now, my only variable is truly my engine (baring an untimely mechanical during the bike leg like an unavoidable flat).
At the end of the day, it has to be earned, one workout at a time. The fastest bike in transition means very little without the engine to drive it. Build your engine, and everything else simply helps it perform at its very best.