EFFORT GUIDE
It is my hope that this short little guide will help you sort out all the terminology that floats around in the endurance space and better tune into your body and how hard you are working. As always, if you have any questions, send me a message, and I'll be happy to help.
TRAINING ZONES
You will hear me talk about training zones a lot. And you will see it in your plan and workout descriptions a bunch. They’re kind of a big deal. Training zones are important because we want to be as focused as possible on your goal which means the intensity of your workouts needs to match the type of efforts you’re training for. For example, I’m not going to make a sprinter run countless hours of zone 2 endurance work when the goal is short, explosive power. That just doesn’t make sense!
There are a myriad of approaches to training zones. Personally, I use a 5 zone approach most of the time. For cycling I may break zone 5 up into three parts as you will see in the chart below. To give you a better idea of what I’m talking about, here are some quick descriptions:
- Zone 1 – Active Recovery: Super low effort. What you will do on easy days to help you get fresh for the next workout.
- Zone 2 – Endurance/ Aerobic Effort / Base Pace: The bread and butter for long distance athletes, this is all day kind of pace.
- Zone 3 – Tempo / Sweet Spot: Working in this zone tends to hit a sweet spot of benefiting both endurance and power.
- Zone 4 – (Lactate) Threshold: This zone is where it starts to hurt pretty good and be pretty challenging. Think of doing your best effort for 20-30 minutes. That’d put you in this zone. Challenging but doable.
- Zone 5 – VO2 Max/Anaerobic Capacity/Neuromuscular Power: This zone is basically your maximal effort and works to improve both maximal oxygen consumption and muscle recruitment.
MEASURING INTENSITIES
At the heart of these training zones is the idea of having measured ranges of intensity. There are several ways to measure this that you will see in your plan.
RPE (Rating of Perceived Effort): For those not employing any tech, and for the swimmers, RPE is just based on your perceived effort with 10 being brutally painful and 1 being nap time.
Heart Rate (HR): Your heart rate correlates very well with your output and your oxygen consumption. I will often note heart rate zones as HRZ. Only downside to using heart rate is that it lags behind the effort somewhat. It’s best to use it in combination with RPE, Power, or both.
Power/Power Zone: On the bike (and more recently with running), we can measure your output in watts, which is a very objective and real time number. Power doesn’t lag, which is nice. You know how hard you are or are not going at any given moment. Extra, and often somewhat expensive equipment is needed in the form of a power meter.
Zone: As you will see in the chart below, heart rate and power zones should match each other so you may simply find myself referring to them just as zone 2 or zone 3. I may also refer to them by name/effort type (i.e. endurance, tempo, threshold, etc.). The bottomline is that they are all interchangeable for a given zone.
HOW DO THESE ALL RELATE?
Great question! I have a handy little chart just for this occasion. Take a look. The “how does it feel” section is aimed primarily at cyclists but should still give you an idea of what the perceived effort feels like.

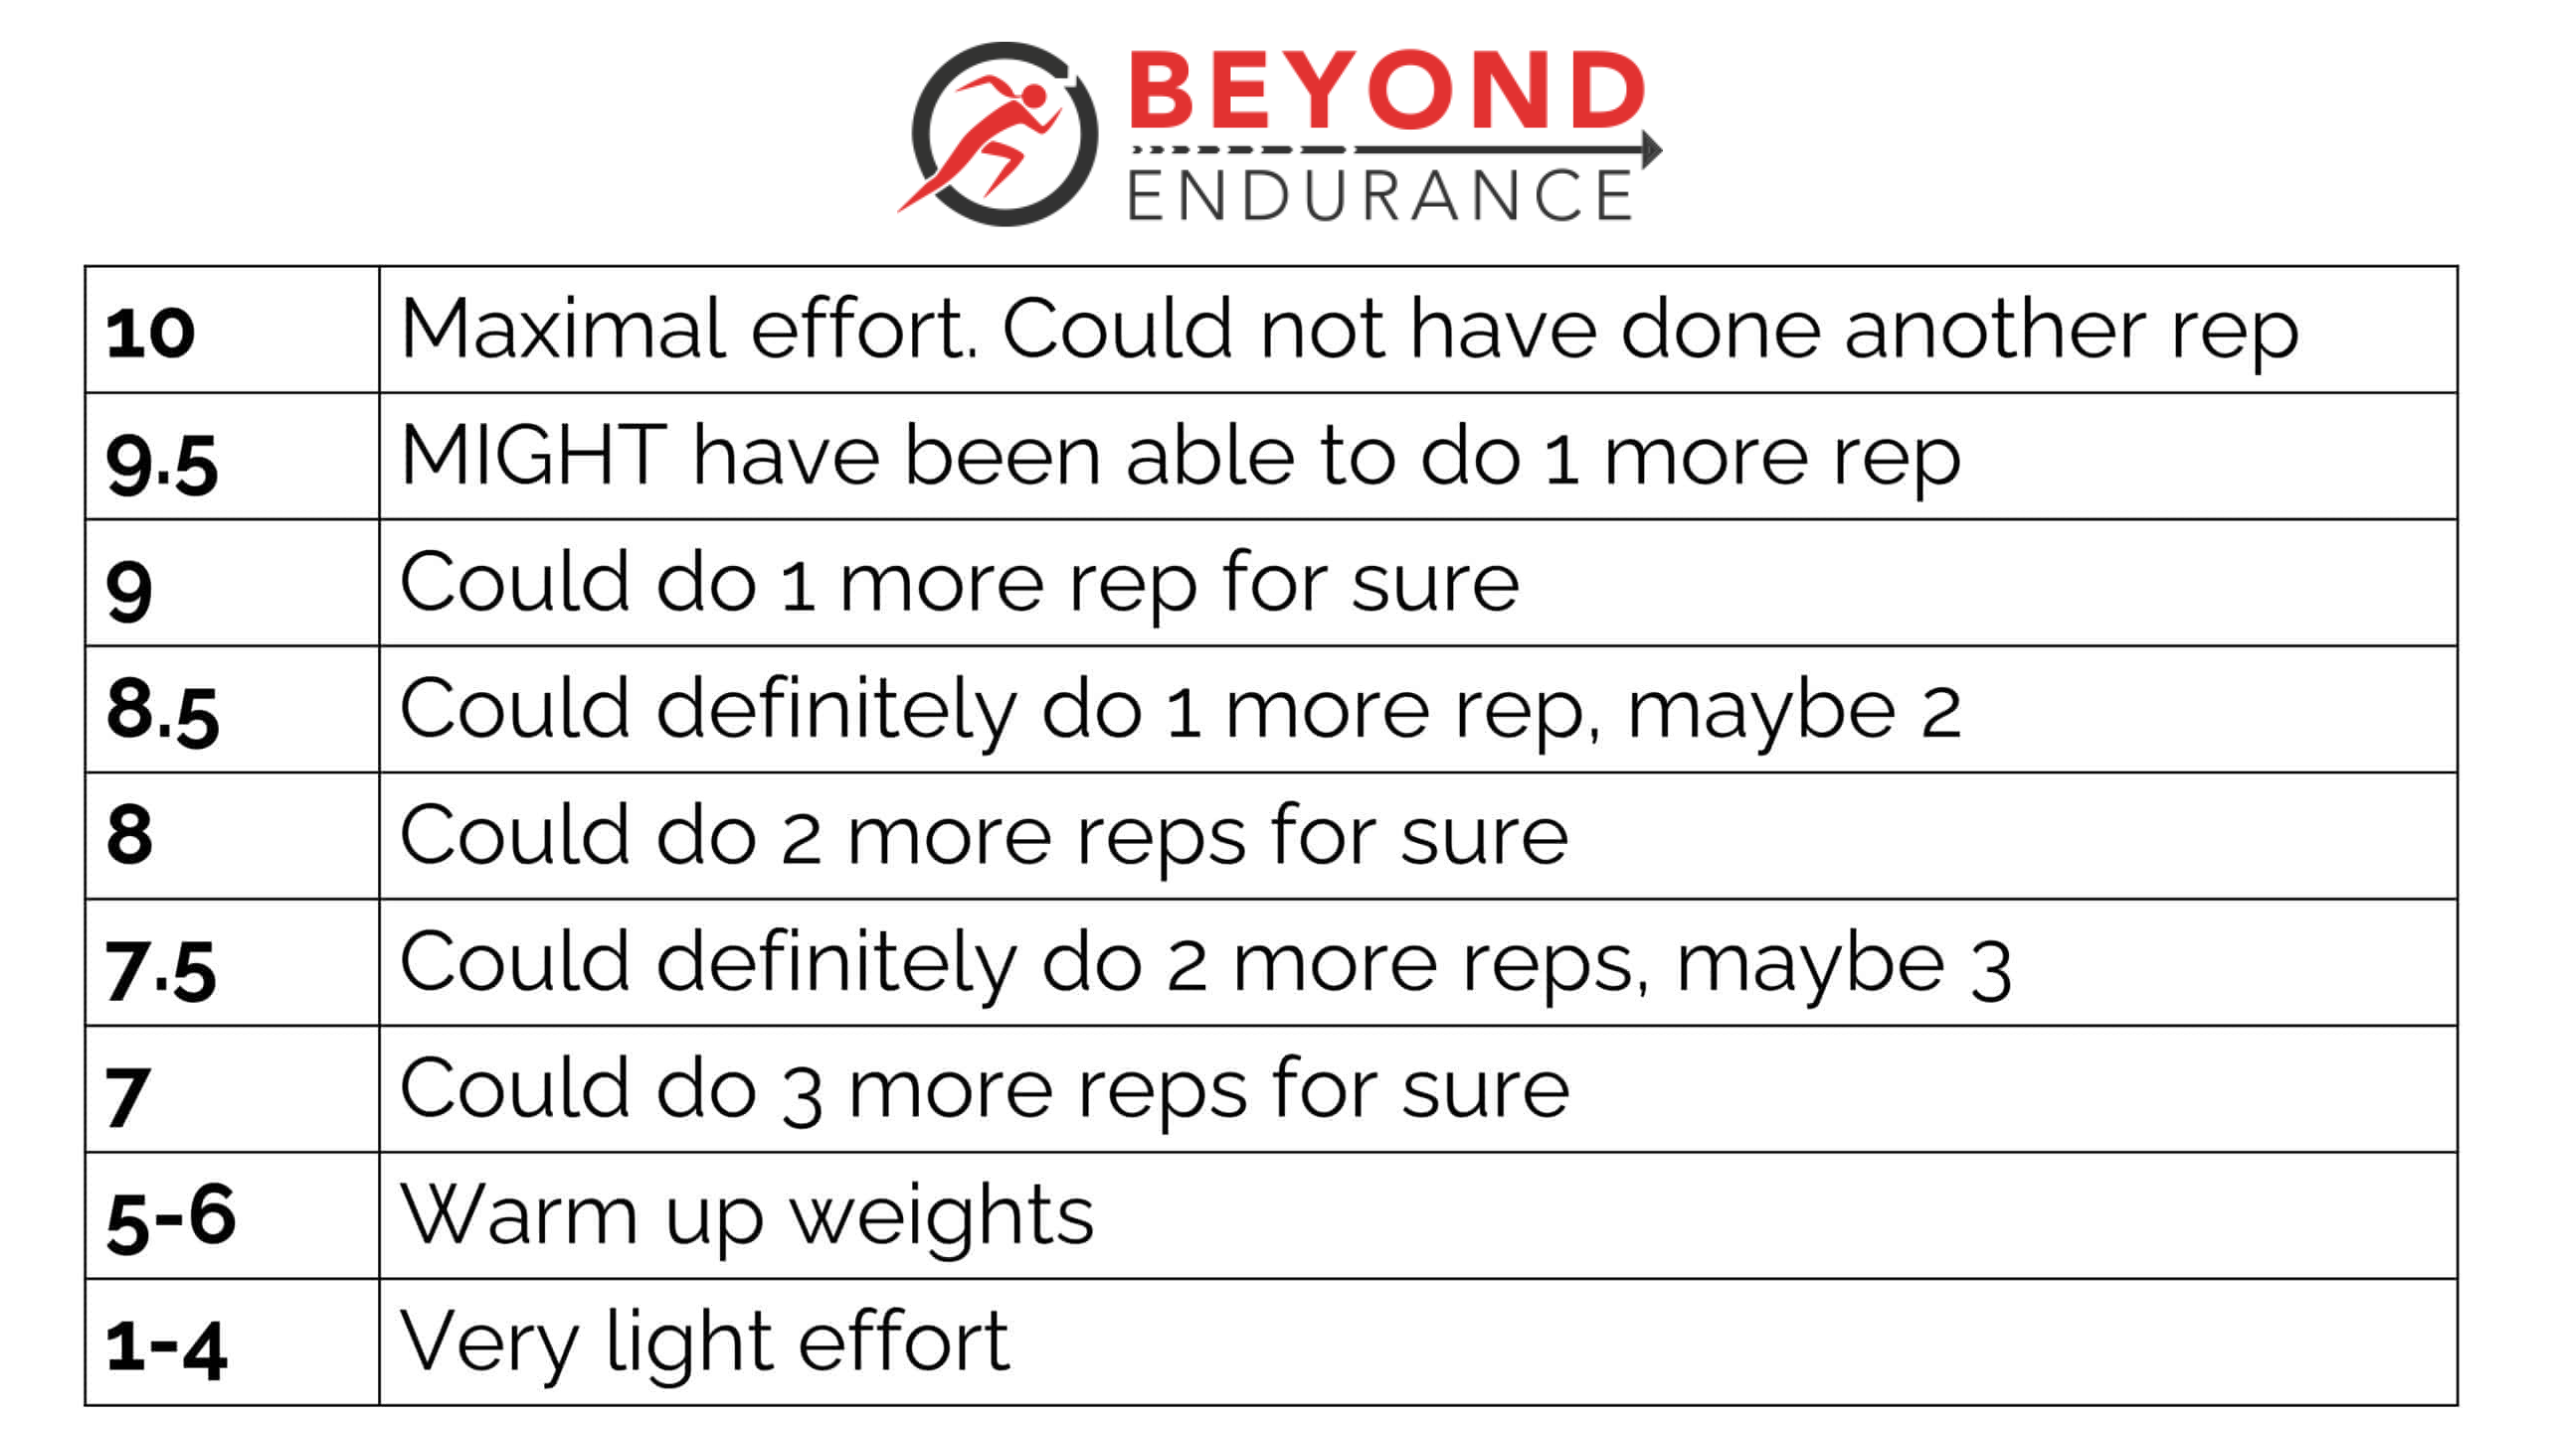
WHAT ABOUT STRENGTH TRAINING?
Perceived effort is a great (and simple) way to navigate the intensity of your strength training. This chart is a helpful tool to help you navigate the intensity of your strength workouts.
